Purpose
Use this guide to:
- Create a category for your scripts
- Create a script under that category
- Run or schedule the script on selected resources
- View execution output and manage existing categories and scripts
Prerequisites
Before you start, ensure:
- You have access to Automation > Scripts v2.
- You know which partner and client you are working with.
- You know which platform your script targets: Windows or Linux.
- Your script output will not exceed 64 KB (see note below).
Note
Avoid running an agent‑configured task with an output of more than 64 KB, as the script output is limited to 64 KB. Output beyond this limit will be truncated.Workflow
The high‑level workflow to create and run a script is:
Step 1: Create a Category
To create a script, you must first create a category to organize it.
- Navigate to Automation > Scripts v2.
- Select the appropriate partner and client.
- If you are a new user and creating a script category for the first time, you will see an empty state with an option to Add a Category.
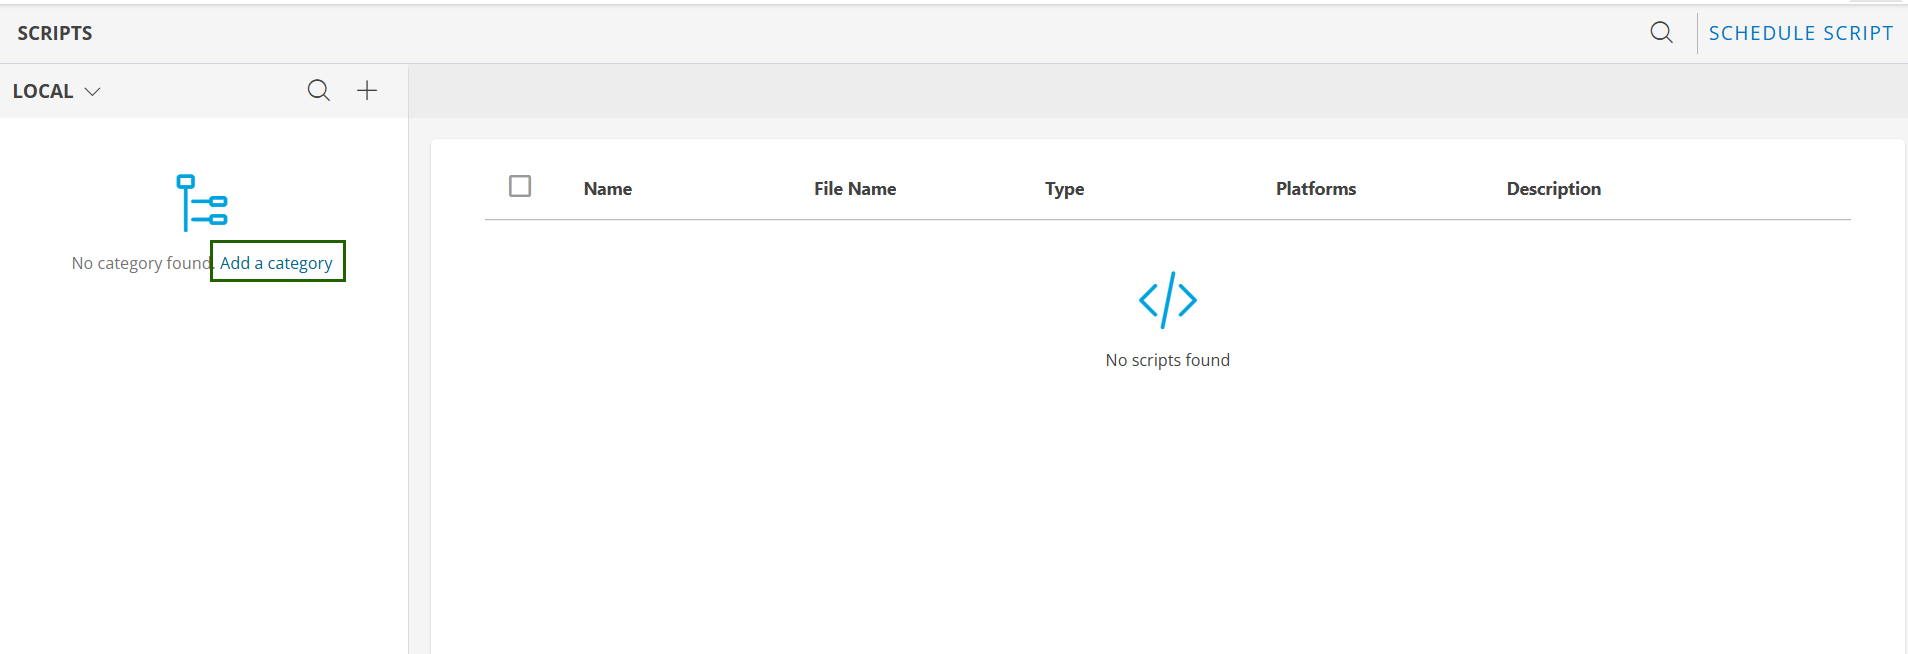
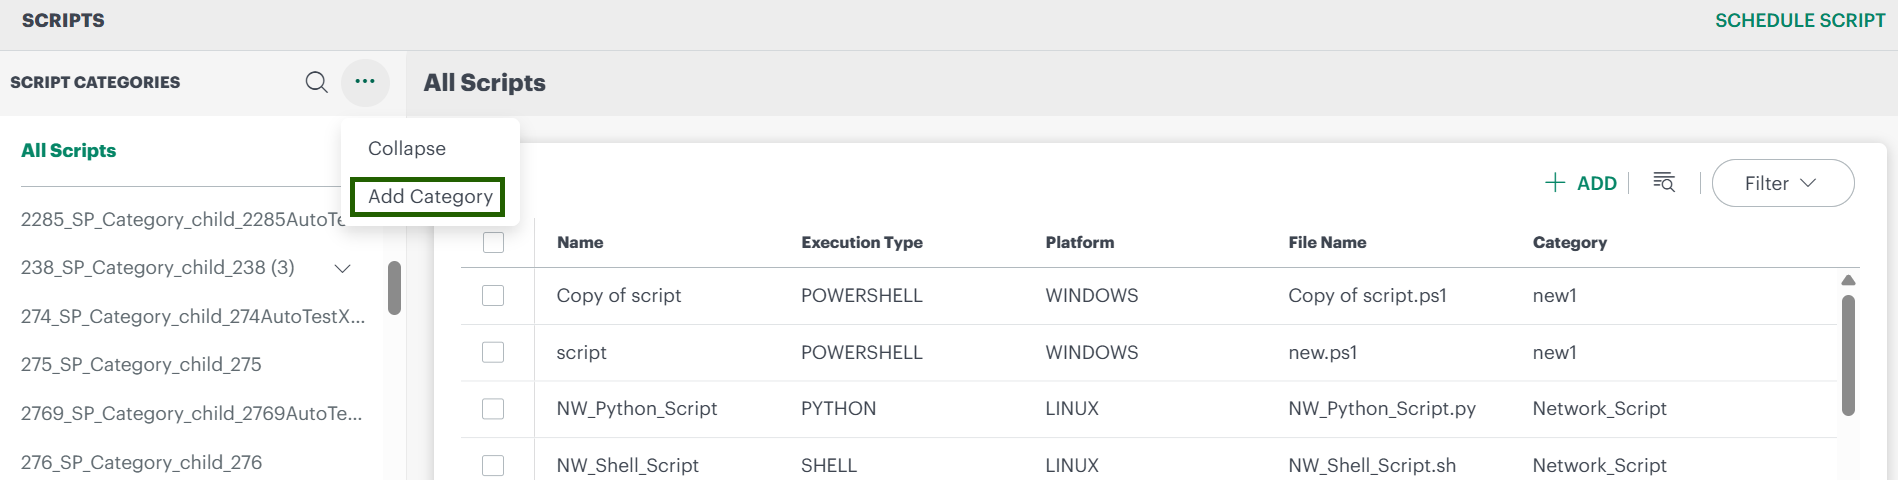
- If you already have existing scripts, you will see the list of categories and scripts, click to Add a Category option to add a new category.
- If you are a new user and creating a script category for the first time, you will see an empty state with an option to Add a Category.
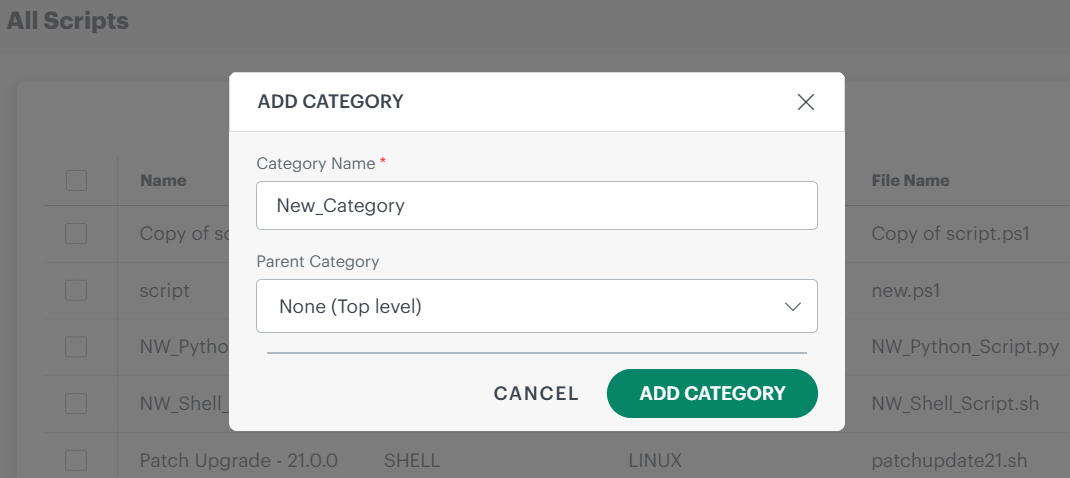
- The Add Category dialog appears. Enter the following:
- Category Name: Enter a meaningful name for the new category.
- Parent Category:
- Select None (Top level) to create a top‑level category, or
- Select an existing category to create this as a sub‑category.
- Click Add Category to save the category.
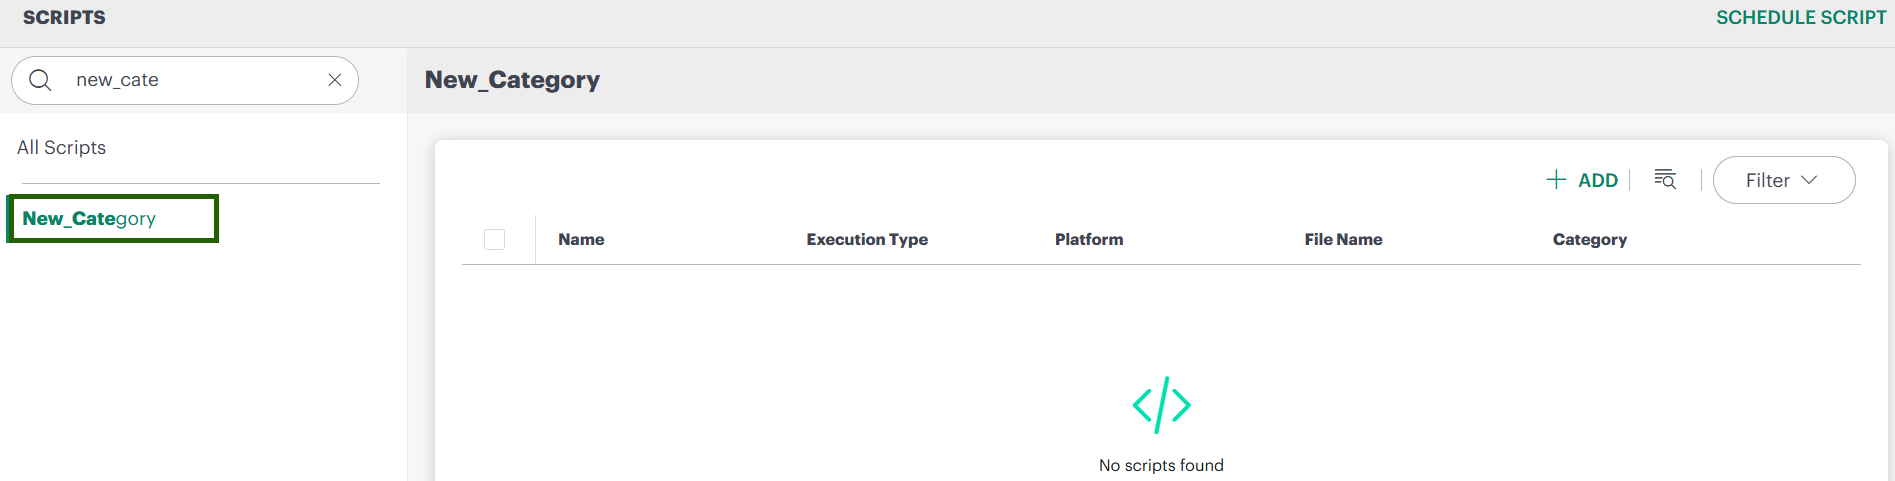
- The new category is created. Use the search option on the left side to find it if needed.
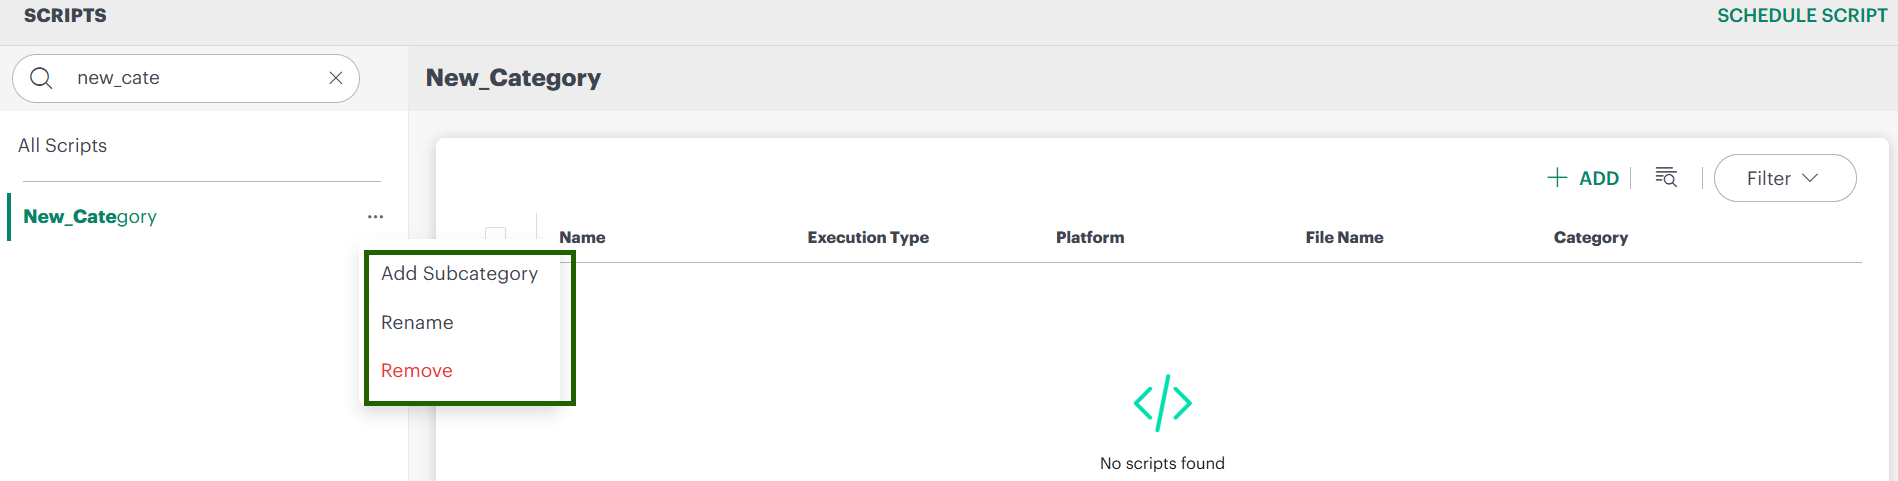
Manage categories
To manage an existing category:
- In the category tree, hover over the category.
- Click the action menu (three dots) next to the category.
- Choose one of the following options:
- Add Subcategory – Create a sub‑category under this category.
- Rename – Change the category name.
- Remove – Delete the category if it is no longer required.
Step 2: Create a Script
Once your category is created, you can add a script under it.
- Select the category where you want to add the script.
- Click the + Add button.
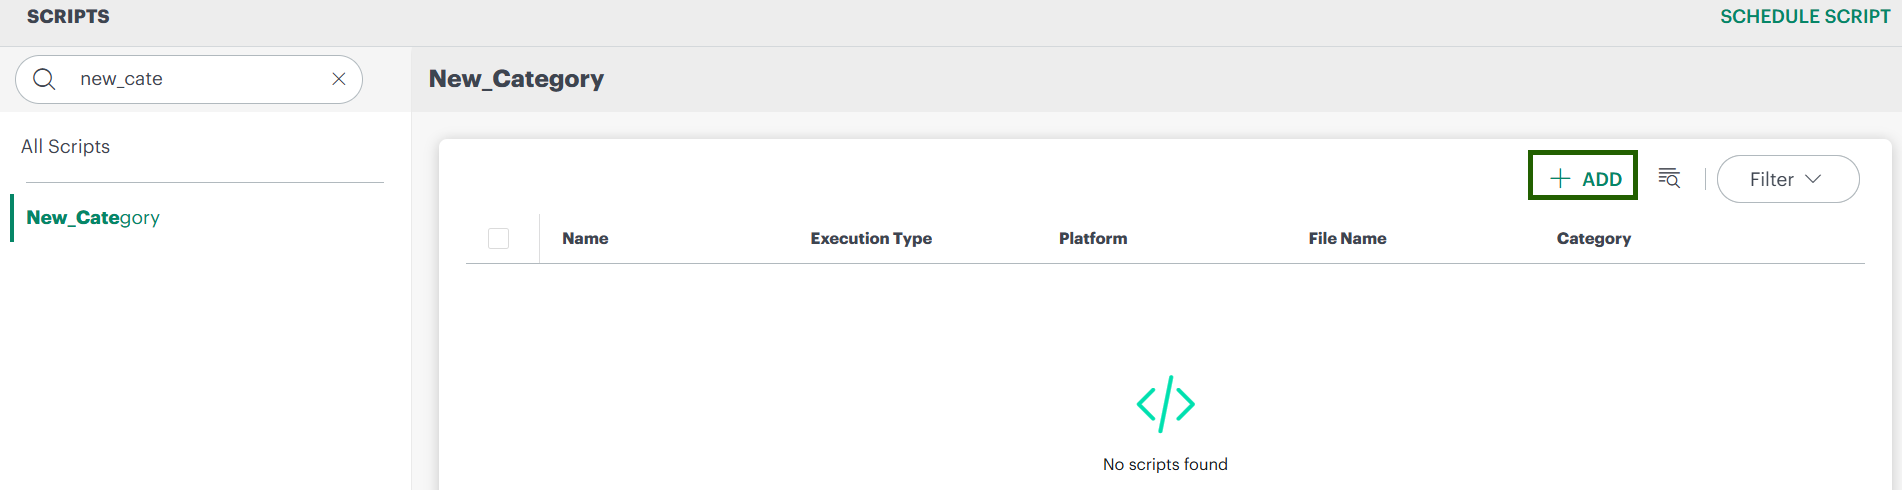
- The Add Script screen appears. Fill in the script details as described below.
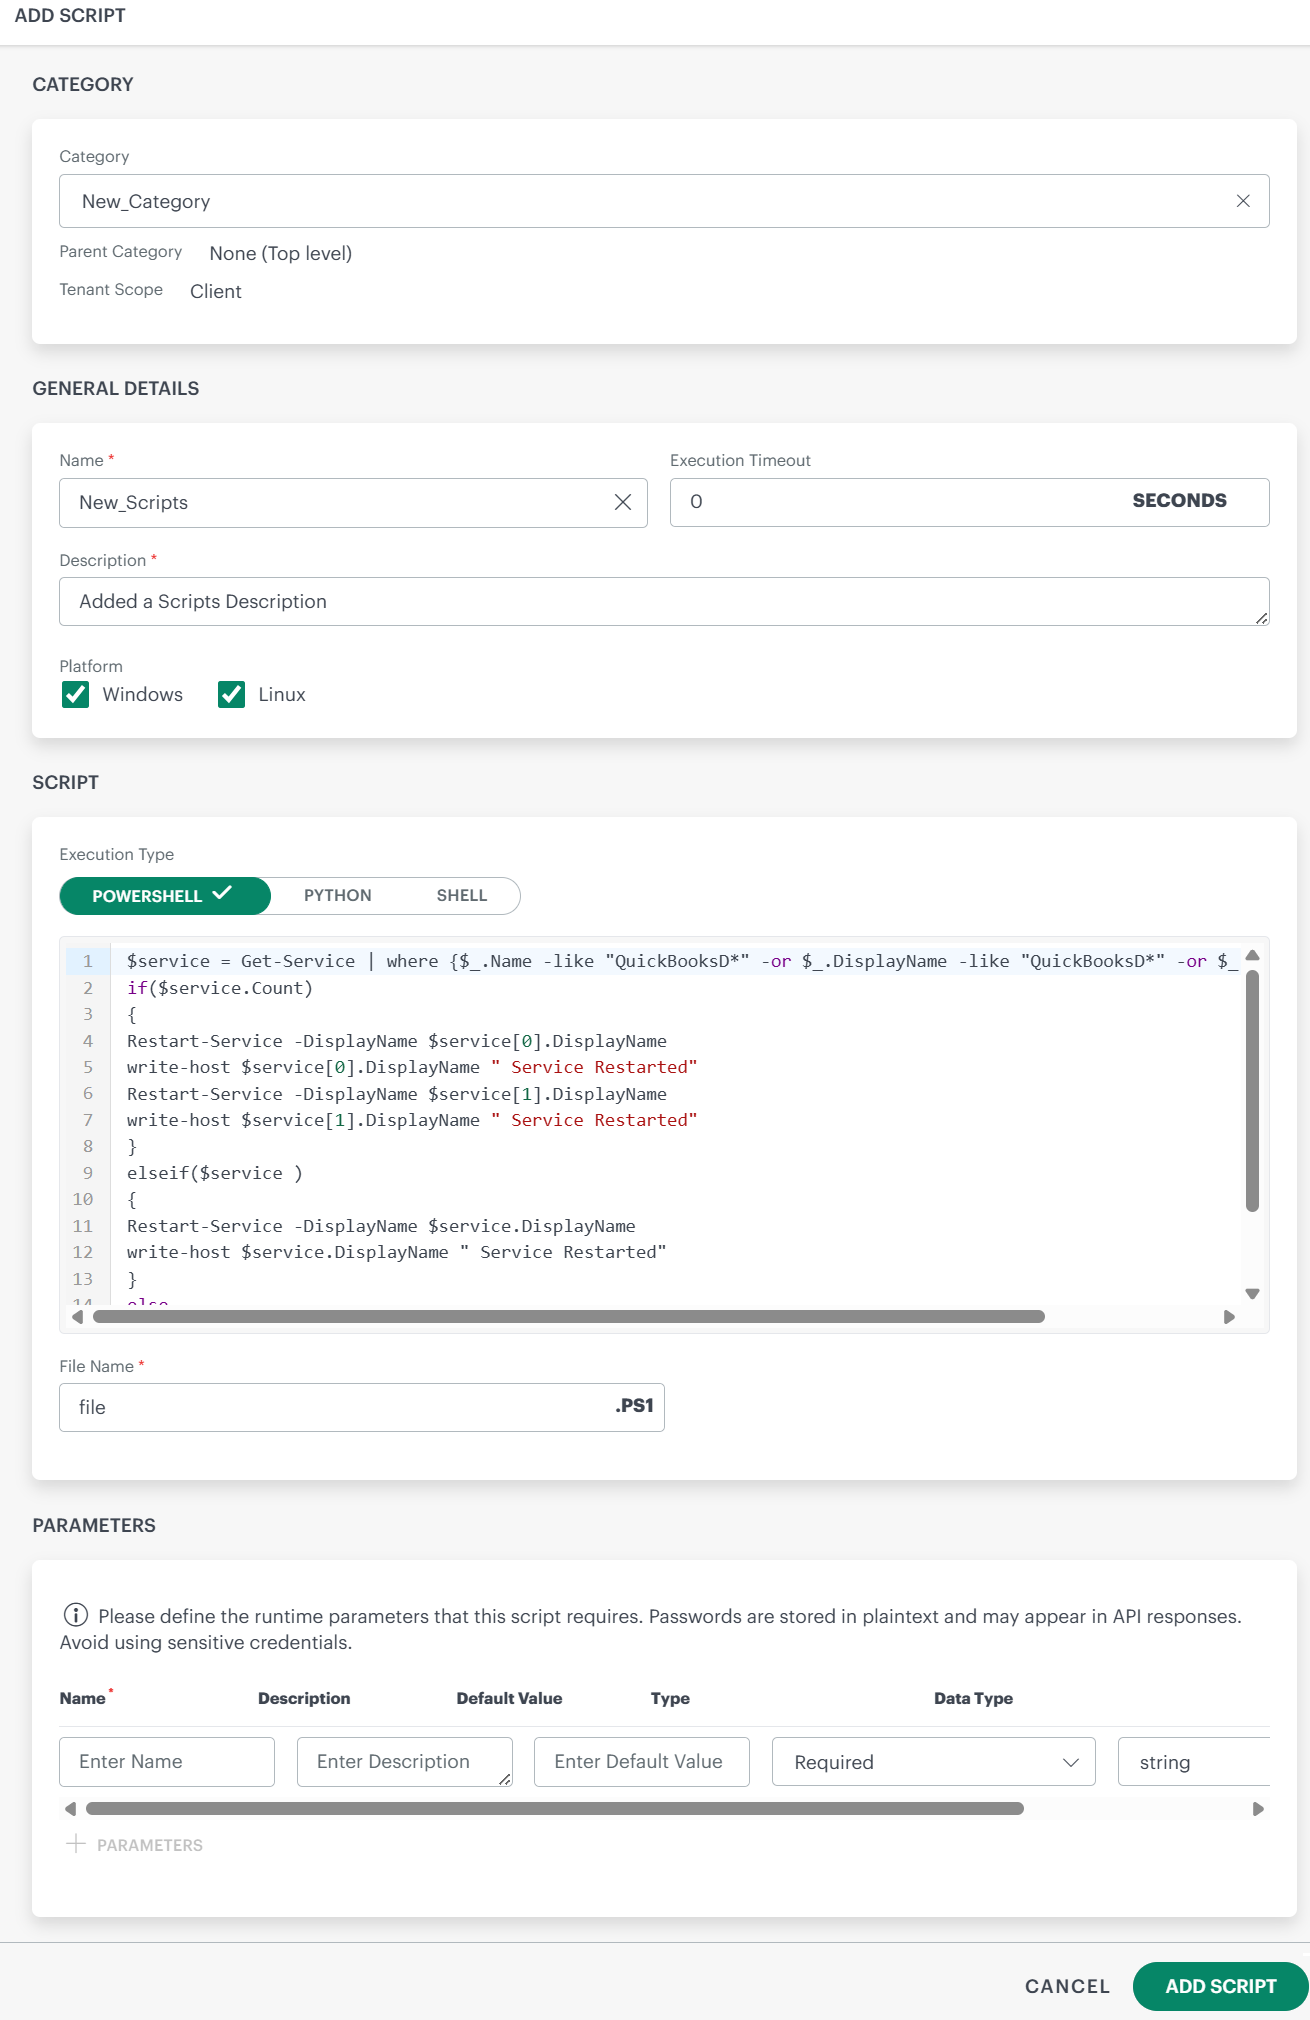
| Section | Field Name | Description |
|---|---|---|
| General Details | Name | Enter the script name. |
| Execution Timeout | Set the execution timeout in seconds. | |
| Description | Provide a short description of what the script does. | |
| Platform | Select the target platform: Windows or Linux. | |
| Script | PowerShell | Enter the PowerShell script code in the text area (for Windows). |
| Python | Enter the Python script code in the text area (if using Python). | |
| Shell | Enter the Shell script code in the text area (for Linux/Unix). | |
| File Name | Specify the file name with the appropriate extension (for example, .ps1). | |
| Parameters | Name | Enter the parameter name. |
| Description | Describe what the parameter is used for. | |
| Default Value | (Optional) Set a default value. | |
| Type | Select the parameter type. | |
| Data Type | Select the data type (for example, string, integer, etc.). |
- After configuring the script and any parameters, click Add Script.
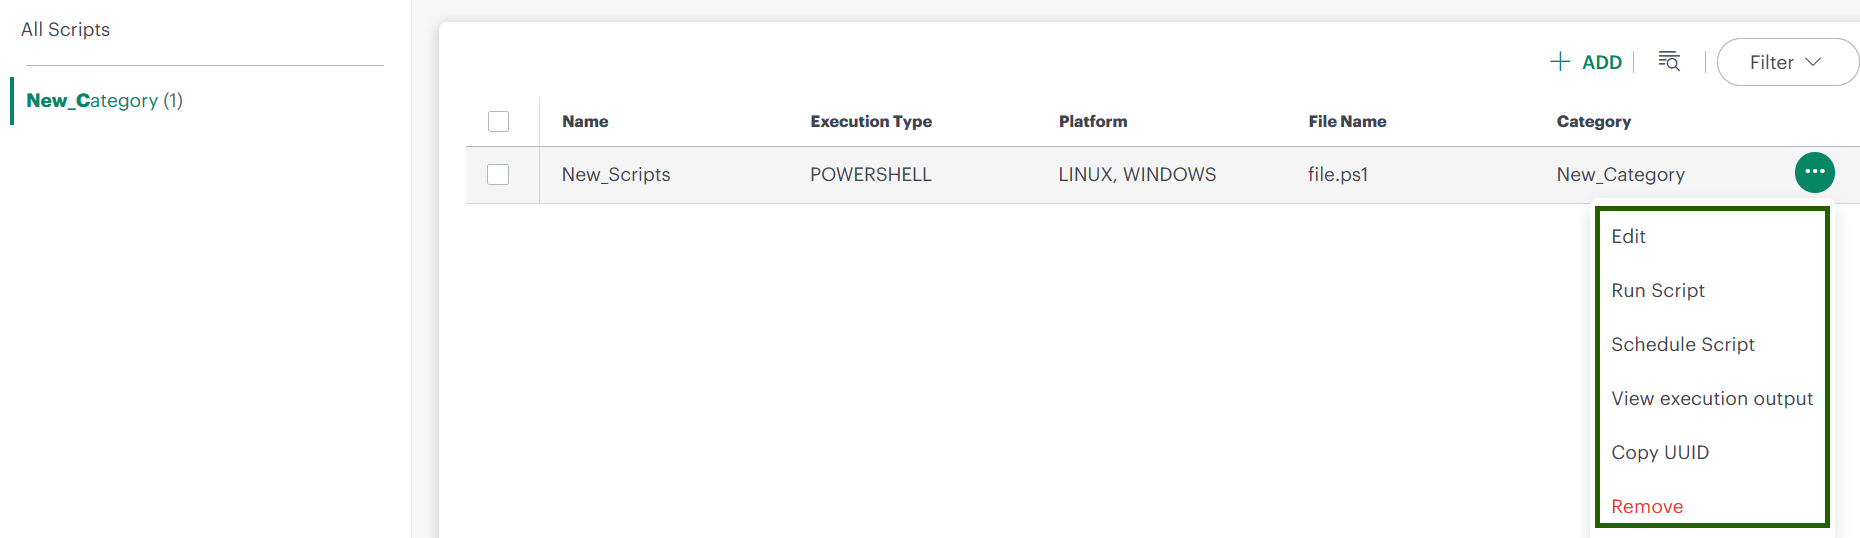
The script is created and appears under the selected category in the Scripts v2 view.

Manage the Scripts
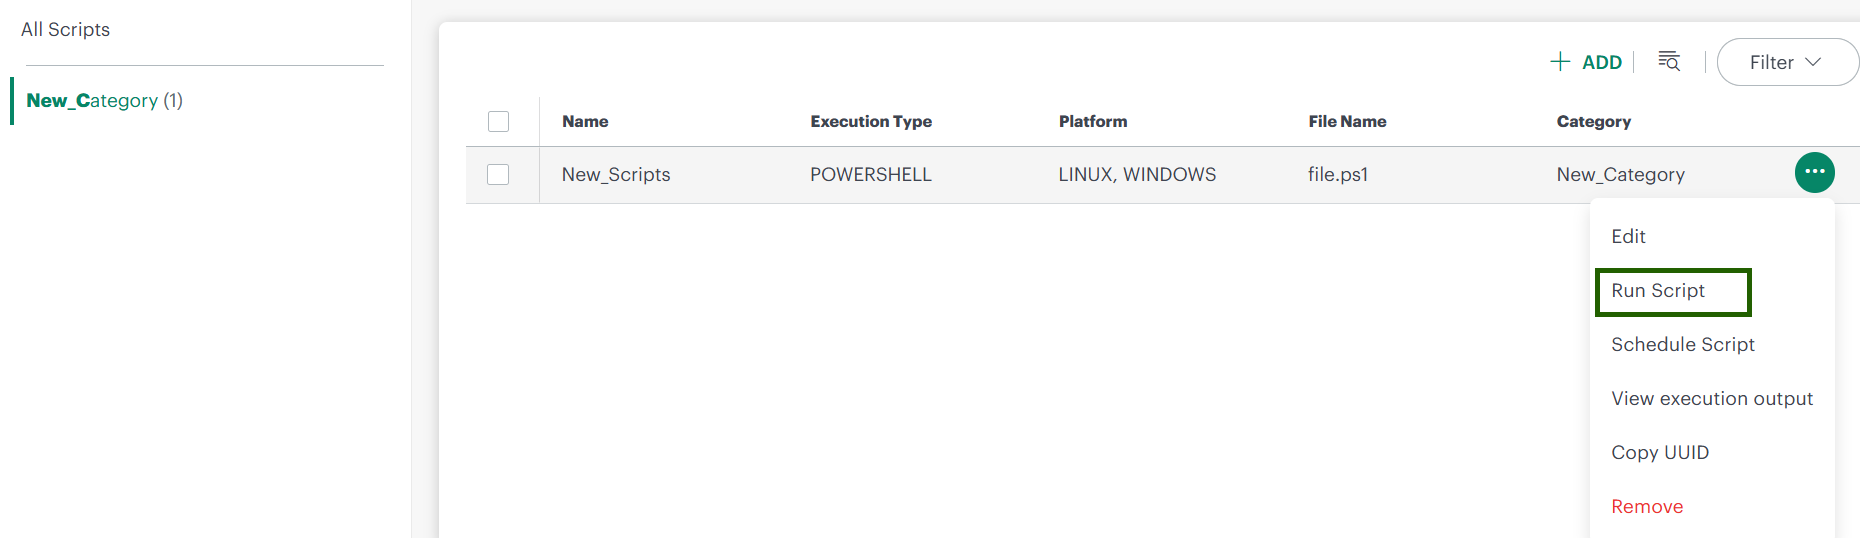
To manage an existing script:
- In the script list, hover over the script.
- Click the action menu (three dots) next to the script.
- Choose one of the following options:
- Edit – Modify the script configuration or content.
- Run Script – Immediately run the script.
- Schedule Script – Schedule the script to run at a specific time.
- View Execution Output – View run status and detailed logs.
- Copy UUID – Copy the script’s unique UUID for use in integrations or references.
- Remove – Delete the script if it is no longer needed.
Step 3: Run a Script
After creating a script, you can run it against specific resources.
- From the script list, click Add Script for the script you want to execute.
- The Run Script page is displayed.
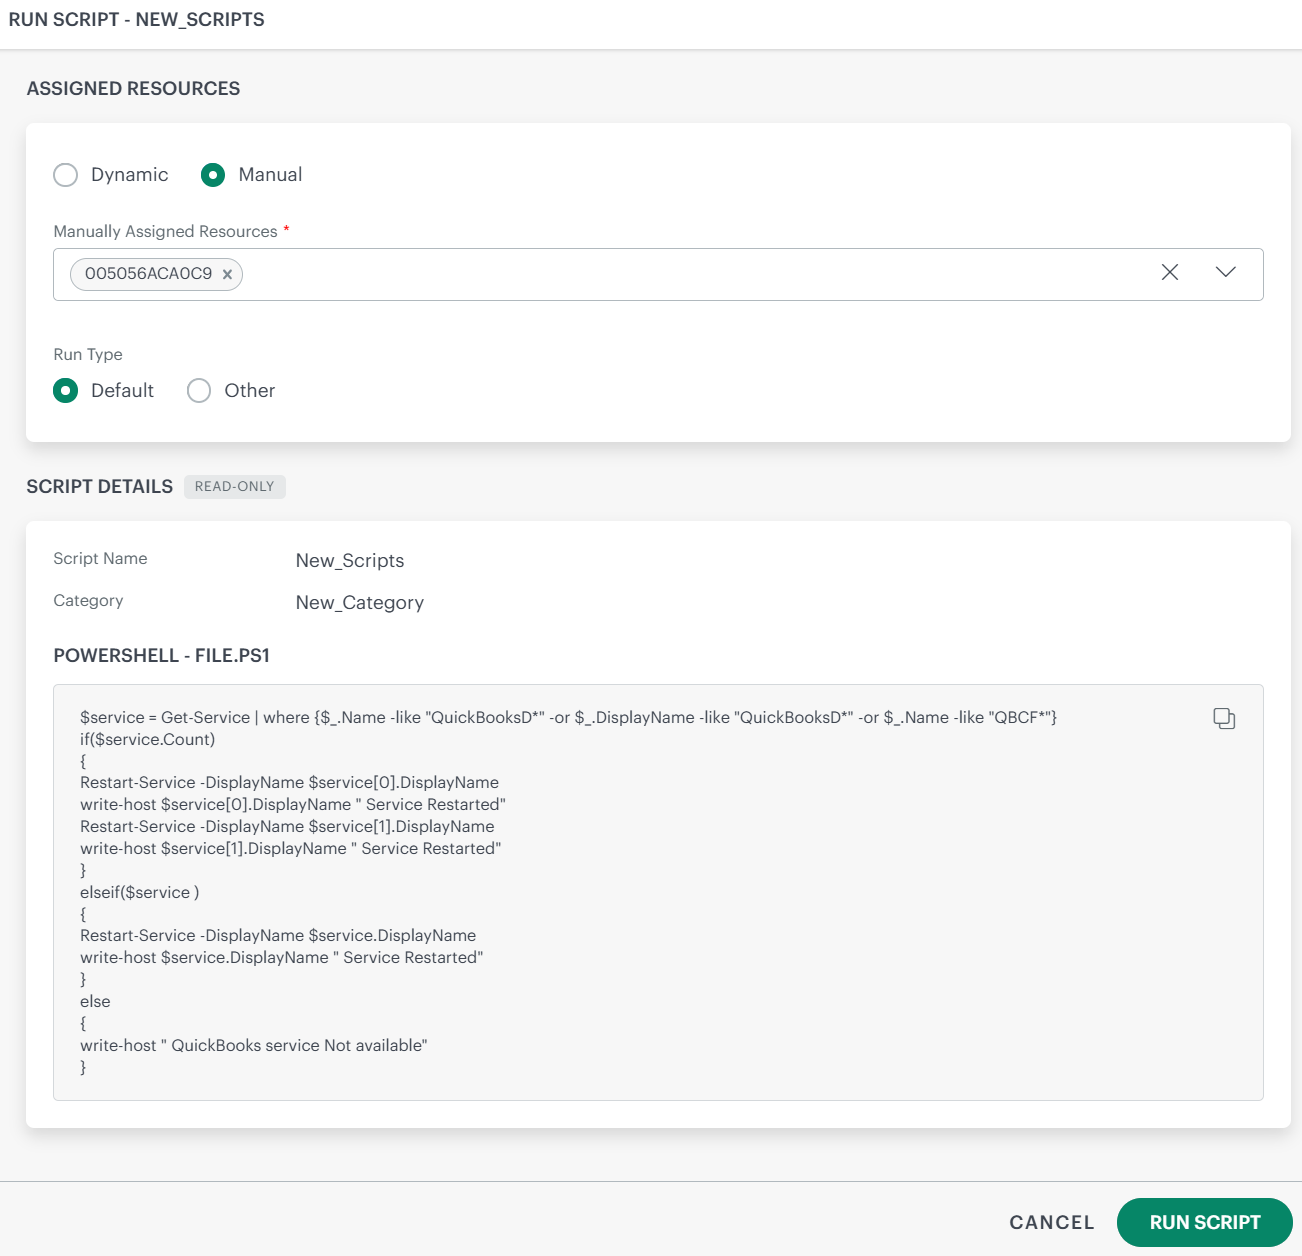
- Assign resources using one of the following options:
- Dynamic: Choose resources by adding an OpsQL query; if any resources match the query, they will be included in the job automatically. This will automate the process and reduce the need for user intervention whenever there are new devices onboarded and required to add new devices to the existing scan job.
- Manual: This is a manual process for searching and selecting resources by defining Resource attributes in a simple search query. The selected resources list would not be updated with newly onboarded devices if the scan schedule is saved with this option. Users have to manually update the list for any onboarding or decommission of the devices on the platform.
- Select run type: either default or other
- Review your resource selection.
- Click Run Script to execute the script.
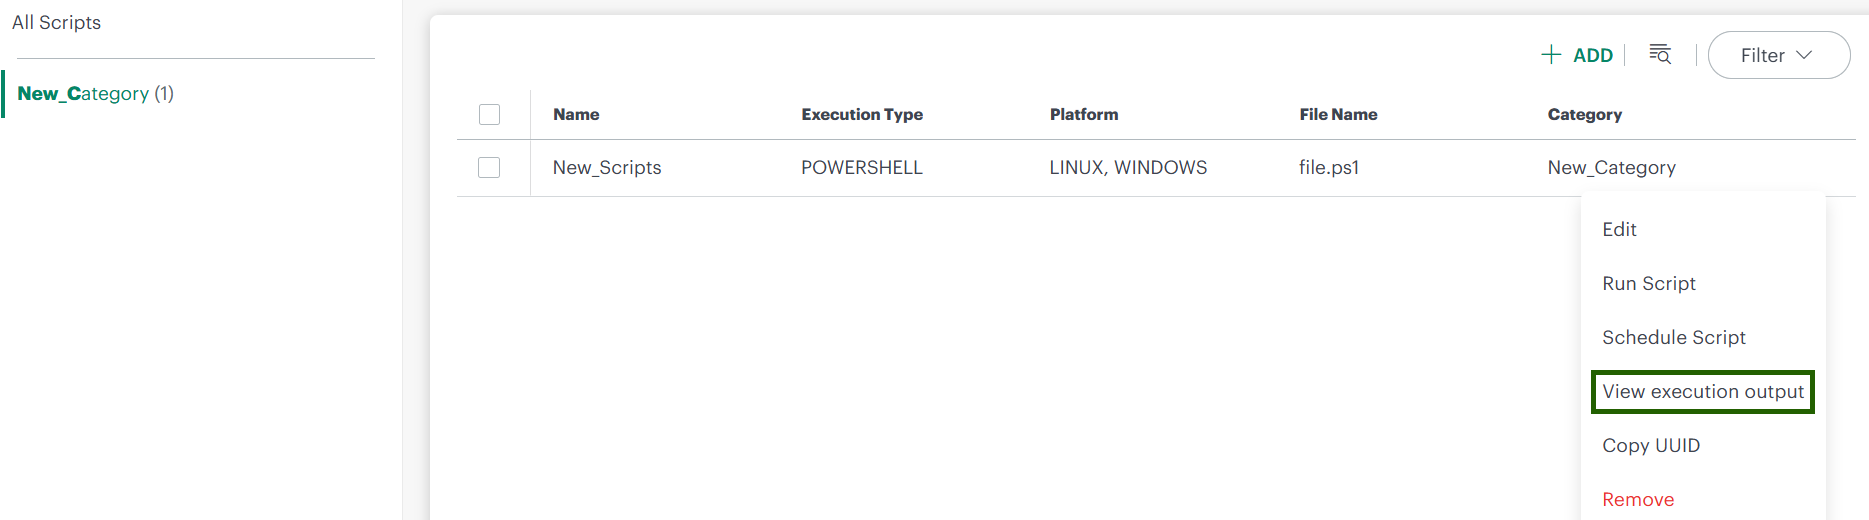
- To view the run status and logs details:
- Go to the script’s action menu and click View Execution Output.
- Review status and logs to confirm successful completion or troubleshoot failures.
Schedule a Script
Use the Schedule a Script document to configure and automate script execution.